

前言
soanr 是一个代码质量管理系统,代码是开源的。在公司统一认证平台还没出来时,sonar 已接入 ldap 提供系统登录认证功能,现在使用 sonar-auth-oidc 插件以 OIDC 协议接入集中认证平台时,发现用户的账户是互斥的(如果现有用户之前采用 ldap 登录,使用 oidc 登录后会创建一个新的用户,没法关联之前的账户),即使用户的所有信息一致也是如此。本文旨在分析具体原因以及寻求一种可实施的解决方案
相关链接:
- soanrqube :https://github.com/SonarSource/sonarqube
- soanr-auth-oidc : https://github.com/vaulttec/sonar-auth-oidc
sonar 插件实现分析
以 sonar-auth-oidc 为例,实现一个 soanr 的插件,需要如下步骤:

1、实现对应的插件接口
soanr 将可以扩展的通用的功能抽象定义放到了 sonar-plugin-api 模块,实现插件首先需要依赖这个模块,然后需要实现什么功能,找到对应的接口定义,以 sonar-auth-oidc 为例,需要实现 OAuth2IdentityProvider 接口。
@ServerSide
public class OidcIdentityProvider implements OAuth2IdentityProvider {

  private static final Logger LOGGER = Loggers.get(OidcIdentityProvider.class);
  public static final String KEY = "oidc";

  private final OidcConfiguration config;
  private final OidcClient client;
  private final UserIdentityFactory userIdentityFactory;

  public OidcIdentityProvider(OidcConfiguration config, OidcClient client, UserIdentityFactory userIdentityFactory) {
    this.config = config;
    this.client = client;
    this.userIdentityFactory = userIdentityFactory;
  }

  //省略非关键逻辑

  @Override
  public void init(InitContext context) {
    LOGGER.trace("Starting authentication workflow");
    if (!isEnabled()) {
      throw new IllegalStateException("OpenID Connect authentication is disabled");
    }
    String state = context.generateCsrfState();
    AuthenticationRequest authenticationRequest = client.getAuthenticationRequest(context.getCallbackUrl(), state);
    LOGGER.trace("Redirecting to authentication endpoint");
    context.redirectTo(authenticationRequest.toURI().toString());
  }

  @Override
  public void callback(CallbackContext context) {
    LOGGER.trace("Handling authentication response");
    context.verifyCsrfState();
    AuthorizationCode authorizationCode = client.getAuthorizationCode(context.getRequest());
    UserInfo userInfo = client.getUserInfo(authorizationCode, context.getCallbackUrl());
    UserIdentity userIdentity = userIdentityFactory.create(userInfo);
    LOGGER.debug("Authenticating user '{}' with groups {}", userIdentity.getProviderLogin(), userIdentity.getGroups());
    context.authenticate(userIdentity);
    LOGGER.trace("Redirecting to requested page");
    context.redirectToRequestedPage();
  }

}
2、实现 plugin 接口,声明扩展类
public class AuthOidcPlugin implements Plugin {

  @Override
  public void define(Context context) {
    context.addExtensions(OidcConfiguration.class, OidcClient.class, OidcIdentityProvider.class, UserIdentityFactory.class);
    context.addExtensions(OidcConfiguration.definitions());
  }

}
3、使用插件打包工具,打包插件
<plugin>
 <groupId>org.sonarsource.sonar-packaging-maven-plugin</groupId>
 <artifactId>sonar-packaging-maven-plugin</artifactId>
 <version>1.18.0.372</version>
 <extensions>true</extensions>
 <configuration>
  <pluginClass>org.vaulttec.sonarqube.auth.oidc.AuthOidcPlugin</pluginClass>
 </configuration>
</plugin>
插件工作原理浅析
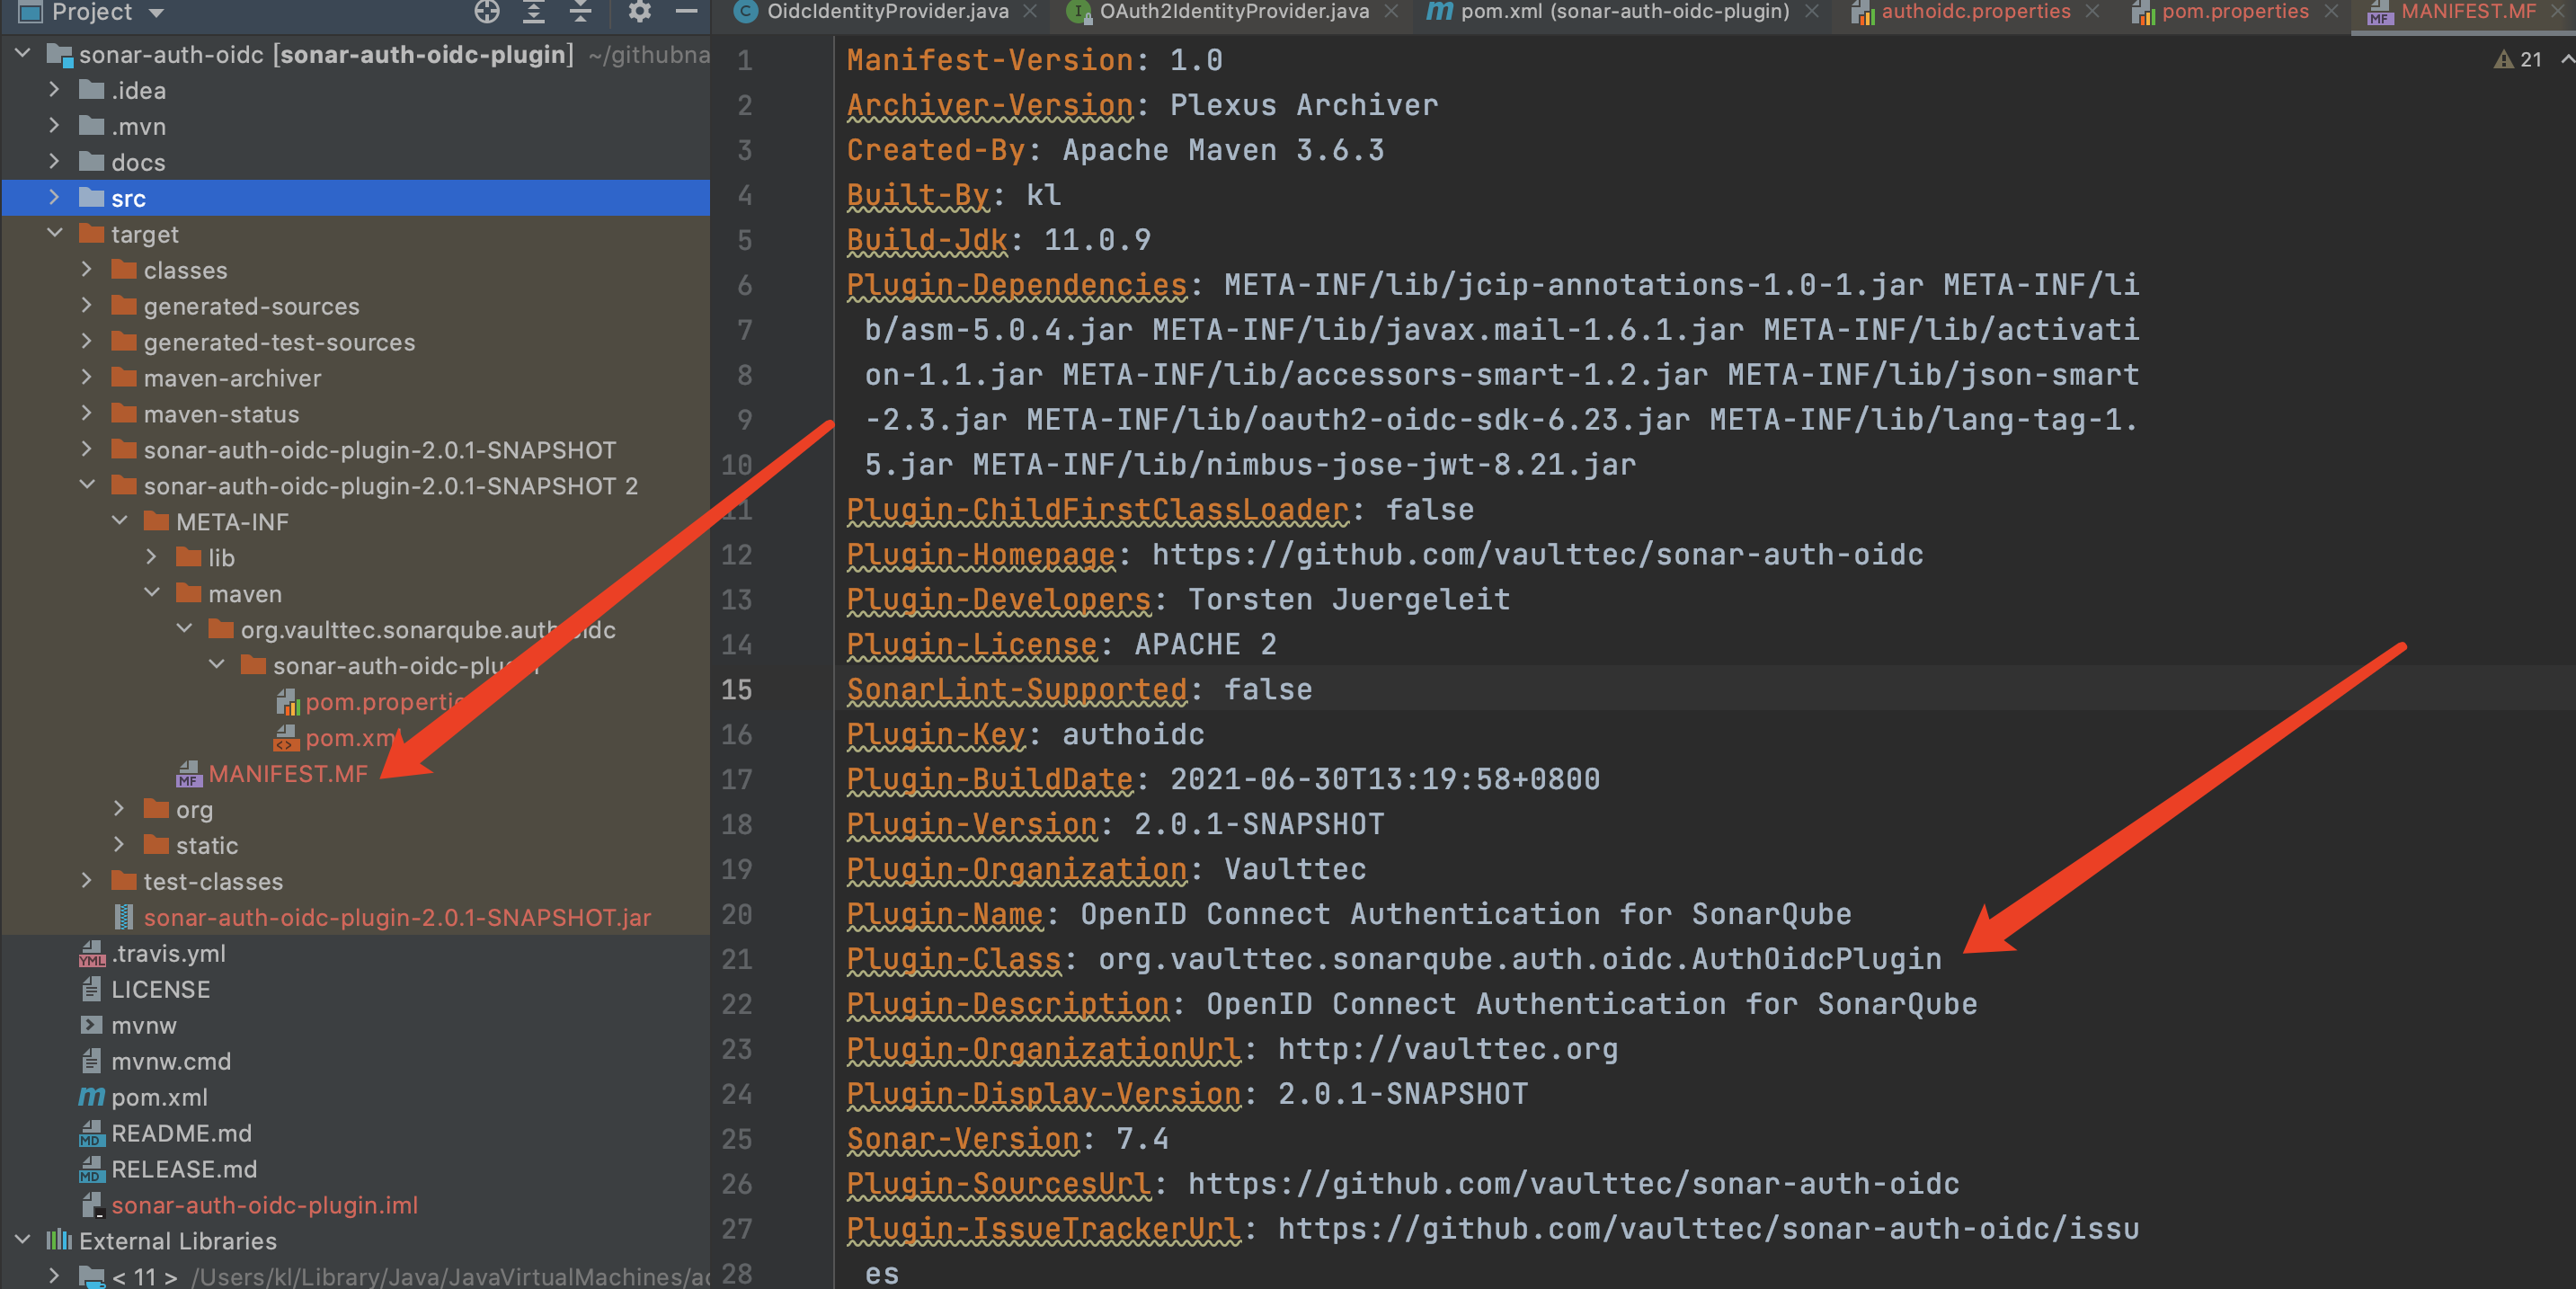
插件完成后,最终会打成 jar 包,在应用市场安装插件,相当于下载了一个 jar 放到了 soanrqube 安装目录的 ./extensions/plugins 路径下。上面的打包工具会给 jar 包清单 META-INF/MANIFEST.MF 里加上Plugin-Class: org.vaulttec.sonarqube.auth.oidc.AuthOidcPlugin 。soanrqube 启动时,插件扫描器会扫到这个 jar ,解析拿到 plugin-class 并加载插件。
sonar-auth-oidc 实现逻辑分析
从sonar 插件实现分析了解到,sonar-auth-oidc 实现 Oauth 认证的关键逻辑在 OidcIdentityProvider 类里,关键代码如下:

init 方法
集成 oidc 插件后,访问 soanr 会显示如下登录入口

该登录按钮的链接为:http://172.26.202.128:9000/sessions/init/oidc?return_to=%2F ,点击这个链接,就会触发插件里 init 方法,init 方法里拼装了 oidc 授权服务器的接口地址并重定向到这地址,等待用户授权
callback 方法
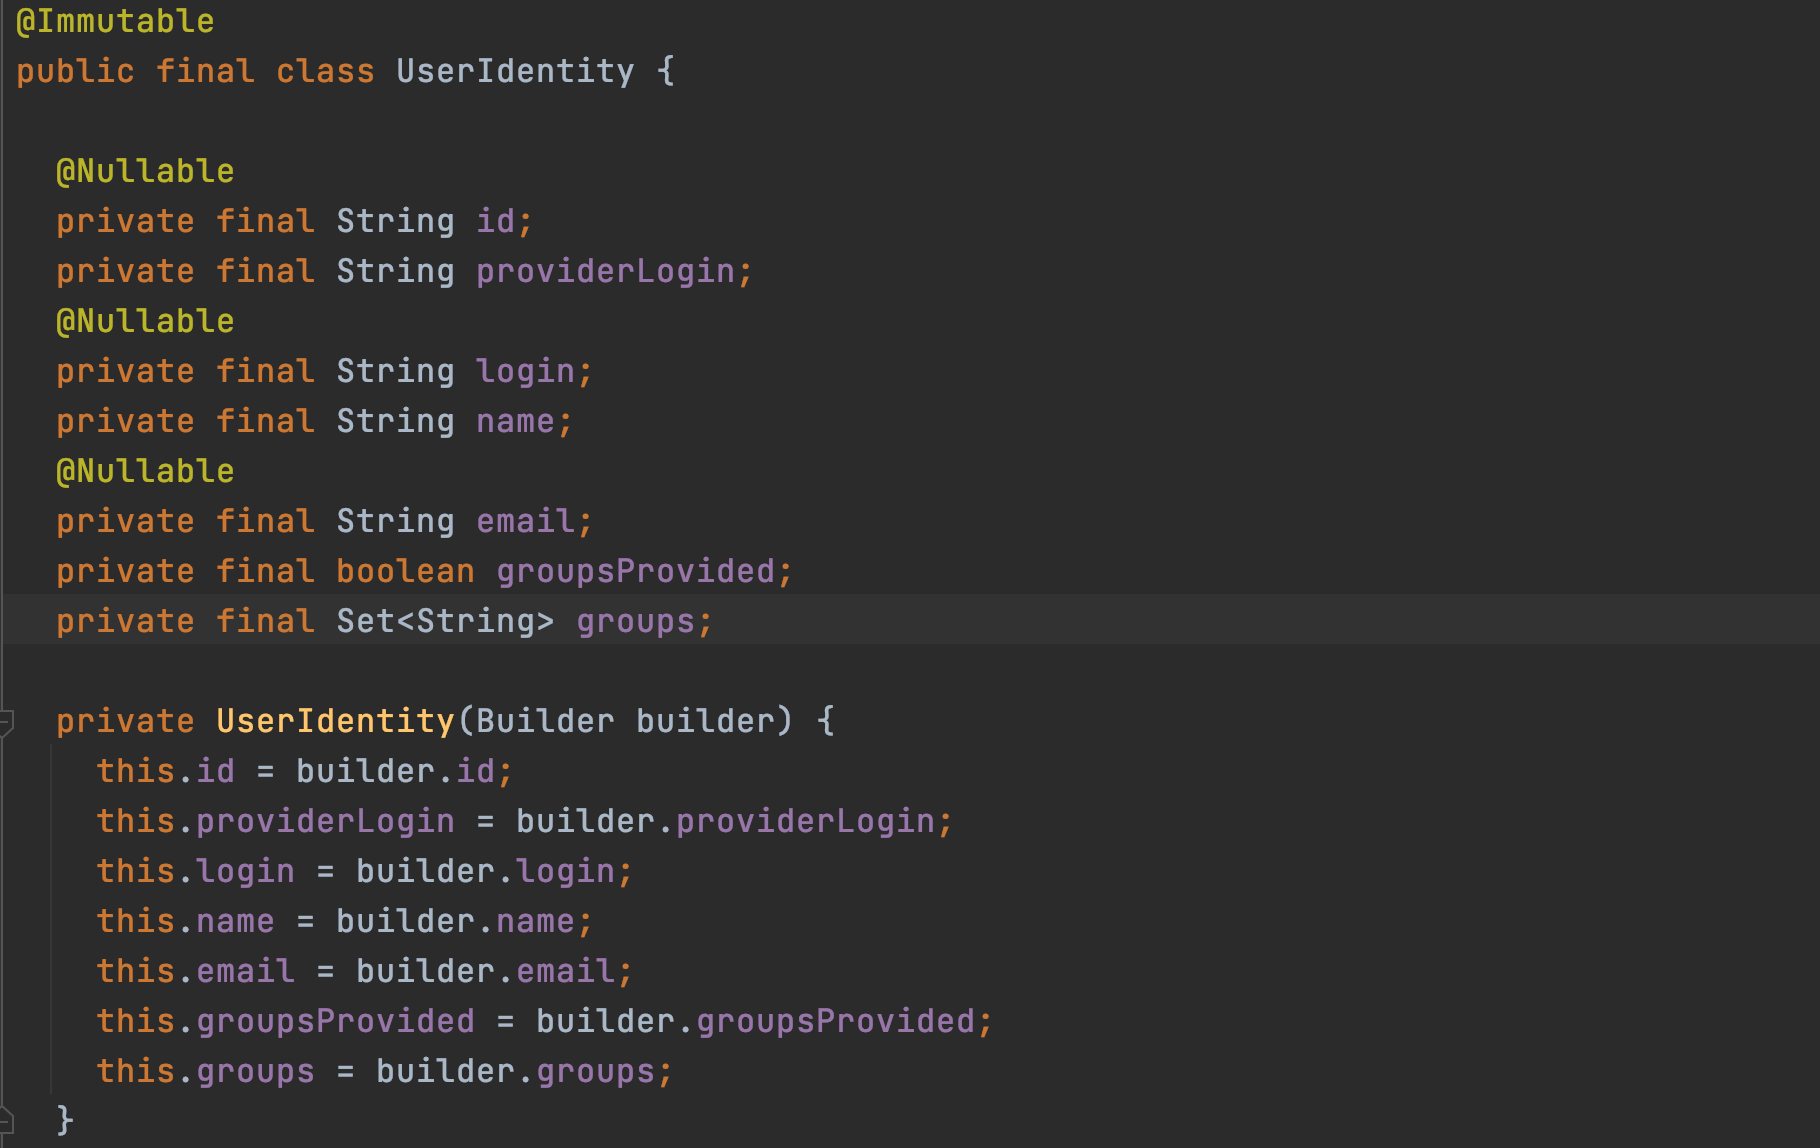
用户在授权服务器授权页面授权完成后,授权服务器会回调 soanr 服务,最终触发 callback 函数。在 callback 函数里,首先从 request 里拿到了 authorizationCode ,然后使用 code 请求 oidc 授权服务器,拿到了 UserInfo,使用 UserInfo 里的信息,组装了 soanr 内置的认证类 UserIdentity 。然后调用了 authenticate 完成认证,如果认证成功,没有异常,则重定向到了登录成功的页面。看到这里,最关键的地方是 UserIdentity ,前面一大堆逻辑,最终就为了组装出这个实体,这个类定义如下:
sonar-auth-oidc 插件里有用的信息,就这些了,关键的是 UserIdentity ,接下来需要从 sonarqube 里找到 CallBackContext 的实现类,看 authenticate() 方法里是怎么处理 UserIdentity 的。
soanrqube 的 auth 模块分析
soanr 的web 登录认证功能在 sonar-webserver-auth 模块,上文在 oidc 插件里出现的 InitContext 、 CallBackContxt 均在 OAuth2ContextFactory 类里被初始化,关键逻辑如下:
authenticate 过程

- 1、执行用户注册逻辑(内部控制了是注册还是更新)
- 2、生成登录用的 jwt 串
- 3、设置本地用户登录的 session
register 过程
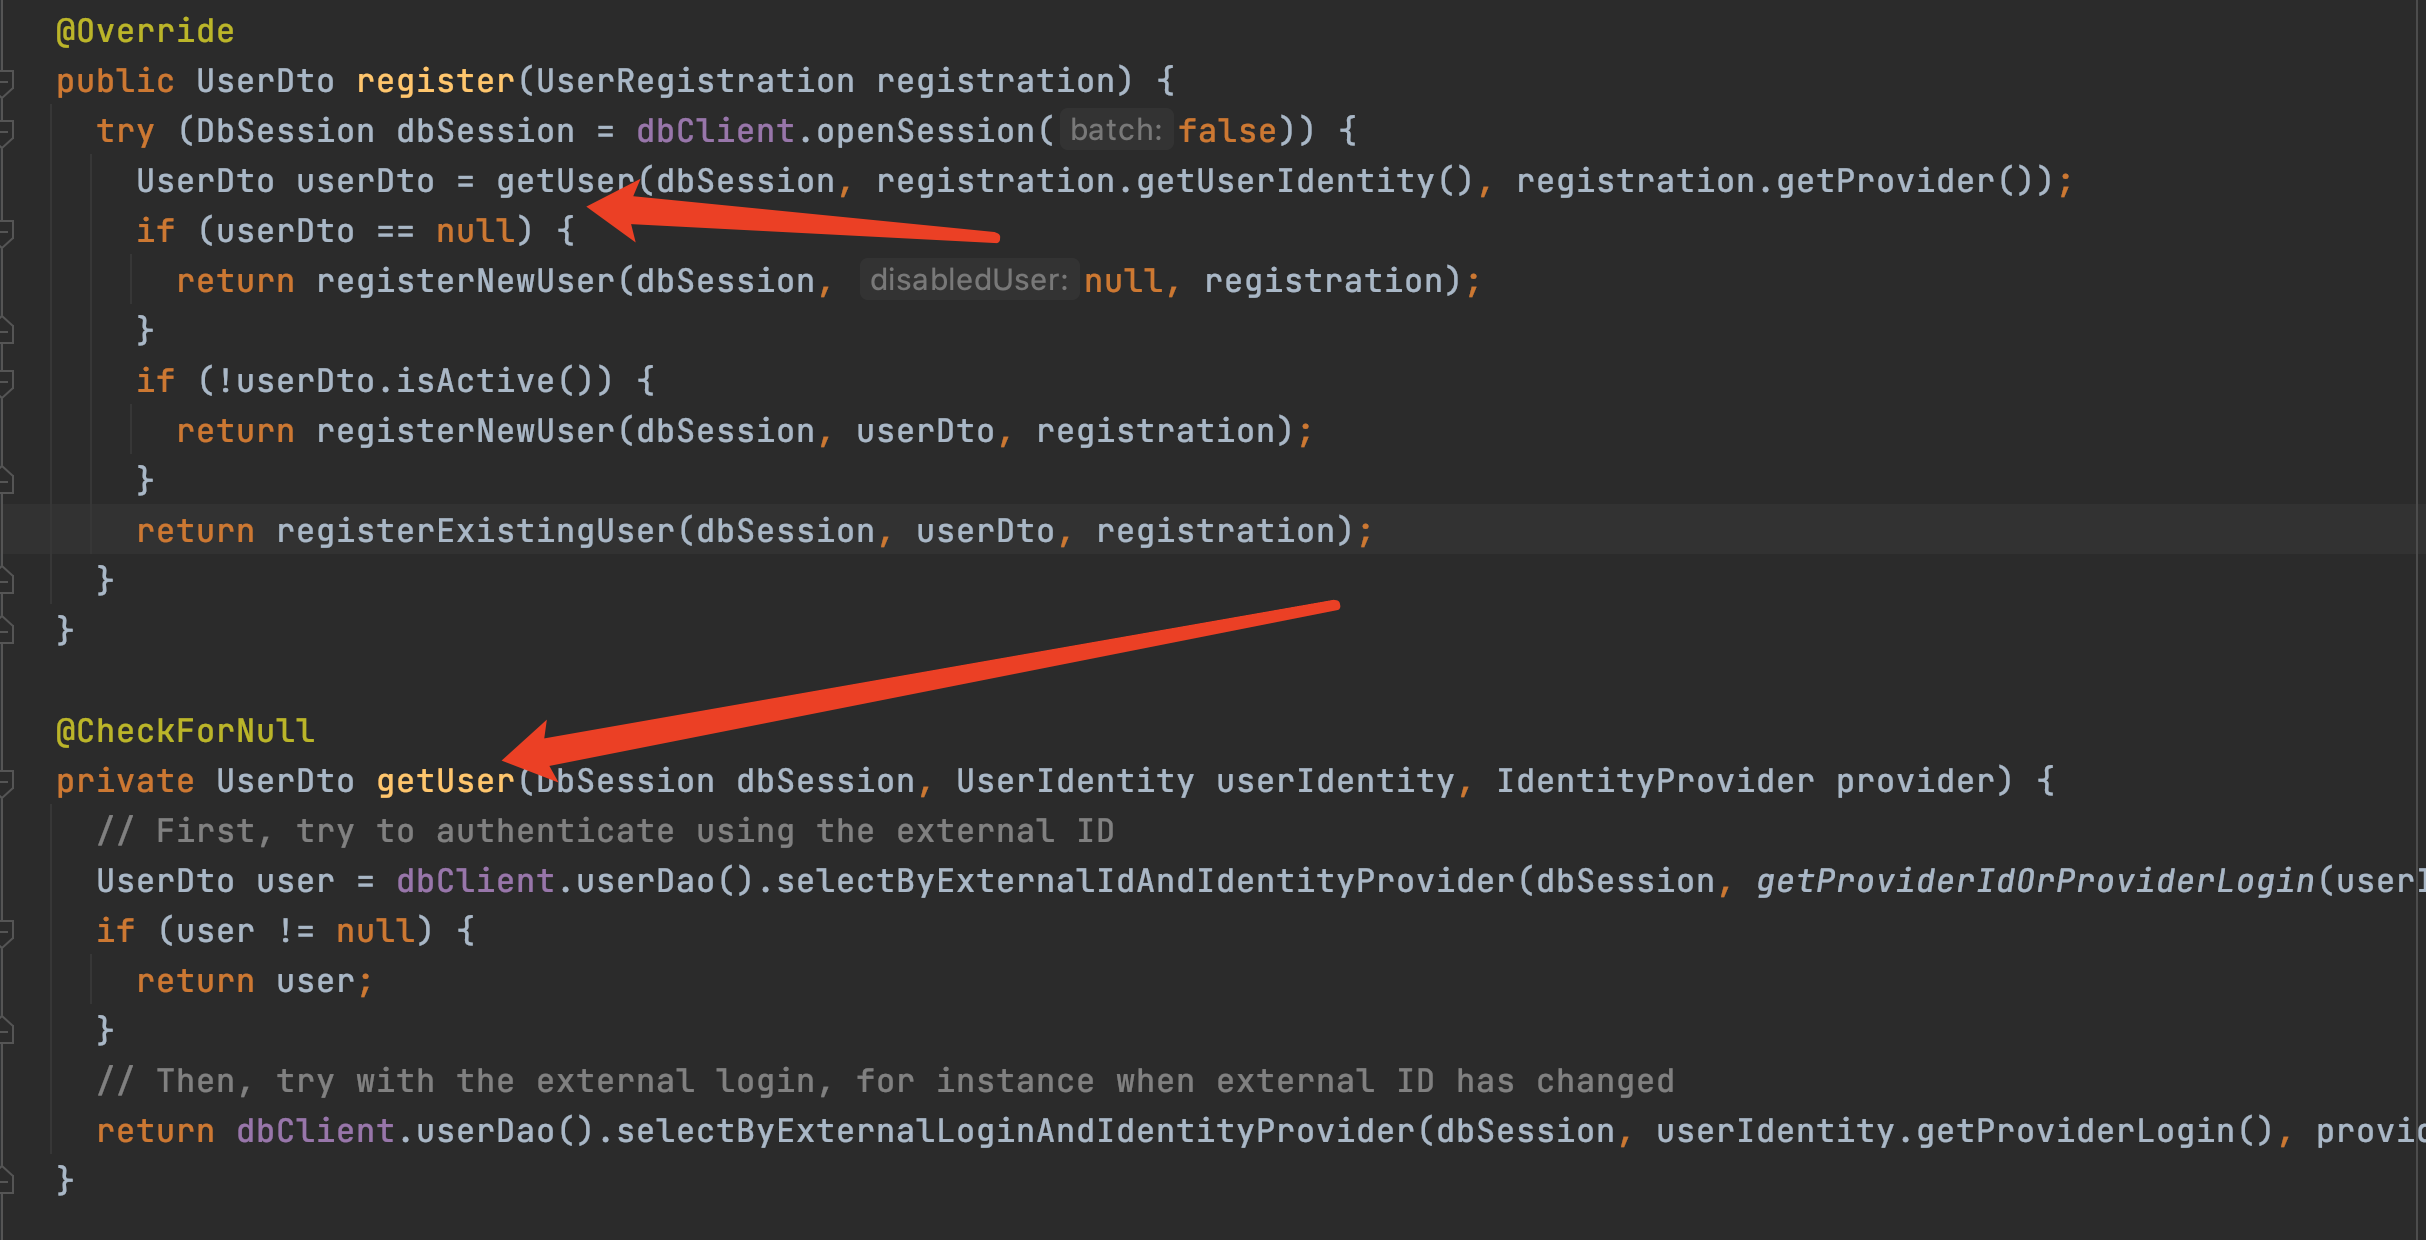
1、通过 externalId 和 IdentityProvider 查询用户,如果为空,则通过 externalLogin 和 IdentityProvider 查询用户
2、如果 user 不存在或者已禁用,则创建一个新的用户,否则注册一个已存在的用户(更新用户信息)
关键点开始凸显出来了,关键逻辑在这里,通过 externalId 和 IdentityProvider、externalLogin 等条件没有查询到用户信息,所以才创建了新的用户,接下来看下数据库里 User 存储了哪些信息。
User 表数据分析
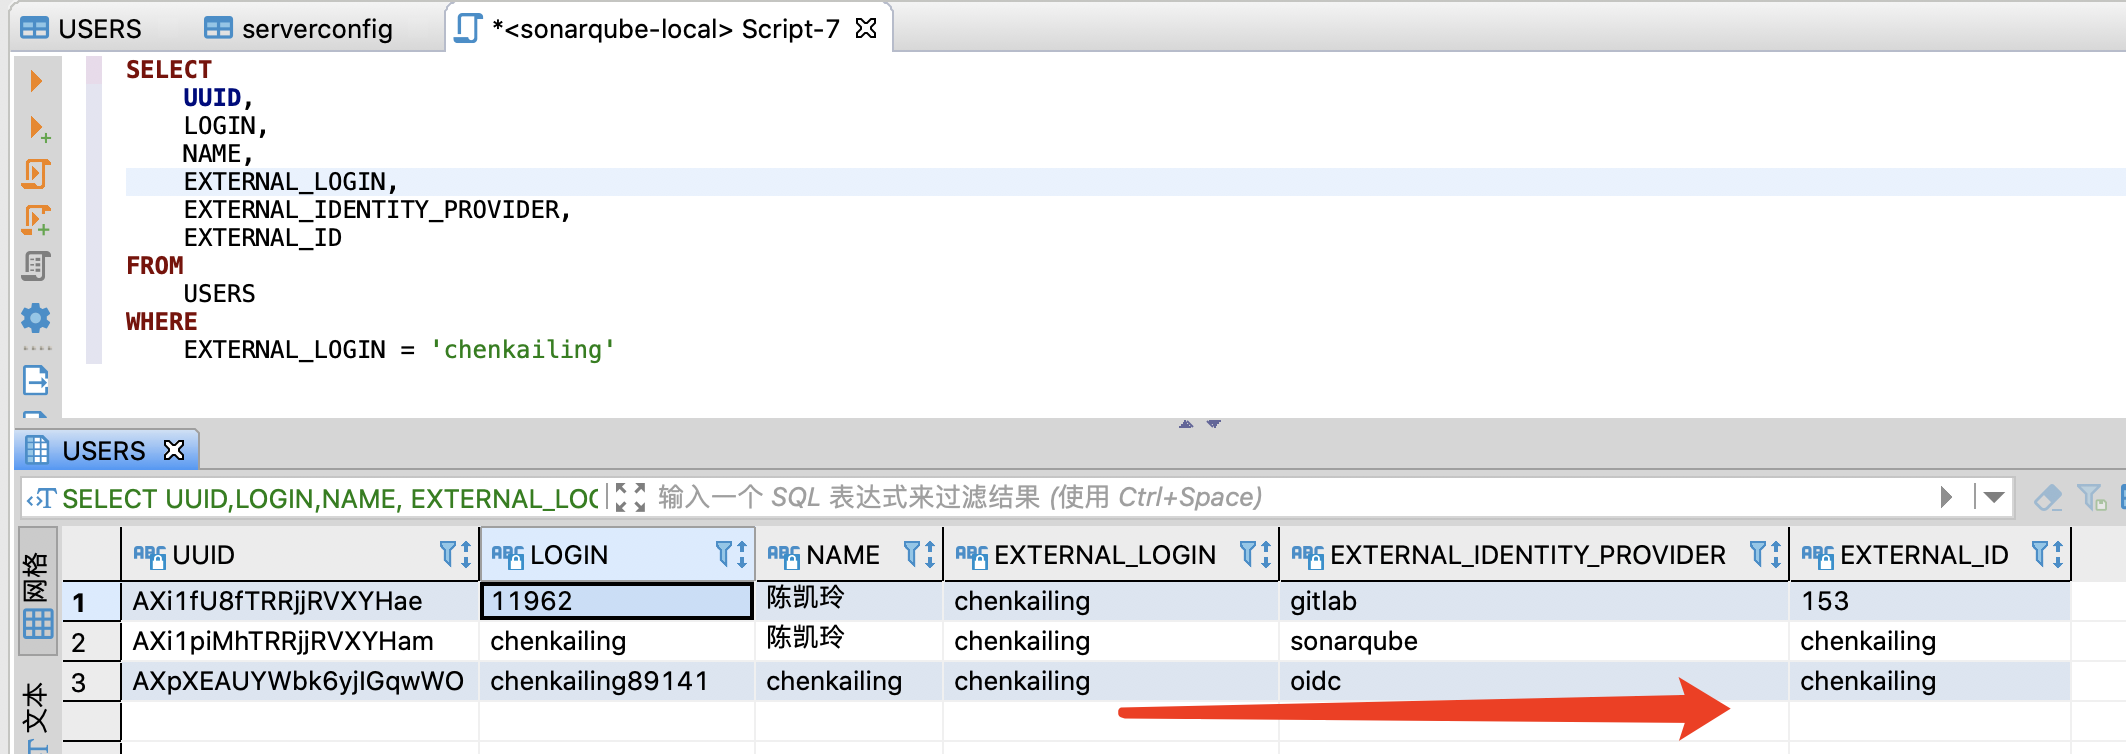
本地 sonar 尝试对接过 ldap 、gitlab 、oidc ,所以一个账户有三条用户数据,其中 ldap 账户的 identityProvider 被标记为 sonarqube 了,而使用 OIDC 登录被标记为 oidc(插件的 key),所以才导致通过 externalId 和 IdentityProvider、externalLogin 等信息都查询不到用户信息
解决方案
经过分析后,知道了 oidc 和 ldap 账户互斥的根本原因为,不同 identityProvider 的用户会被加上 provider_key 区分,导致同一个用户,即使用户信息一样,从不同的 identityProvider 认证也会生成不同的用户。所以,可以从如下两个方案出发,解决问题
方案一:重写插件,将 identityProvider 标识和 LDAP 的同步。
- 优点:兼容 LDAP 和 identityProvider 账户,可以设计下兼容所以的 identityProvider
- 缺点:实施比较困难,需要自己维护插件或者寻求官方仓库合并 pr
方案二:修改数据库中存量 LDAP 用户的 identityProvider 的标识为 oidc。
- 优点:改动较简单
- 缺点:LDAP 和 OIDC 不兼容,集成 OIDC 后,只能被动的关闭 LDAP,而原 LDAP 的输入框和本地用户密码框是一起的,没法移除,对用户使用习惯会有影响
